How does it work if I want to buy a product at JC-Electronics?
If you order via the webshop, you will receive a confirmation by e-mail with more information and the order will be processed and shipped. When you request a quote, you will receive the price and delivery time within one working day. Once you have agreed, the order will be processed and shipped.
Which payment methods does JC-Electronics accept?
That differs per country. The most commonly used online payment methods are accepted by JC-Electronics. In addition to paying online, you can also transfer the money in advance or pay afterwards on account (missing approved)
Can I pay afterwards?
Yes, you can also pay afterwards. The first payment for new customers is always in advance, after which it can be checked whether you are eligible to pay on account (after the fact).
Will I receive a track & trace code?
Yes, you will receive a track & trace code after placing an order. This applies to all our carriers.
How can I log in to JC-Electronics?
Anyone who is a customer of JC-Electronics or who places an order via the website will receive or have an account to log in with. At jc-electronics.com you can log in at the top right of the page.
How do I create a customer account with JC-Electronics?
Anyone who is a customer of JC-Electronics or who places an order via the website will receive or create an account to log in with.
How can I change my (shipping) address?
You can change addresses in your account. Go to Addressbook and add a new address.
How do I add additional users (company users) to our company account?
As an administrator (company administrator) of the company account, you can add additional users (company users).
- From the storefront, the company administrator signs in to the account.
- In the left panel, choose Company Users.
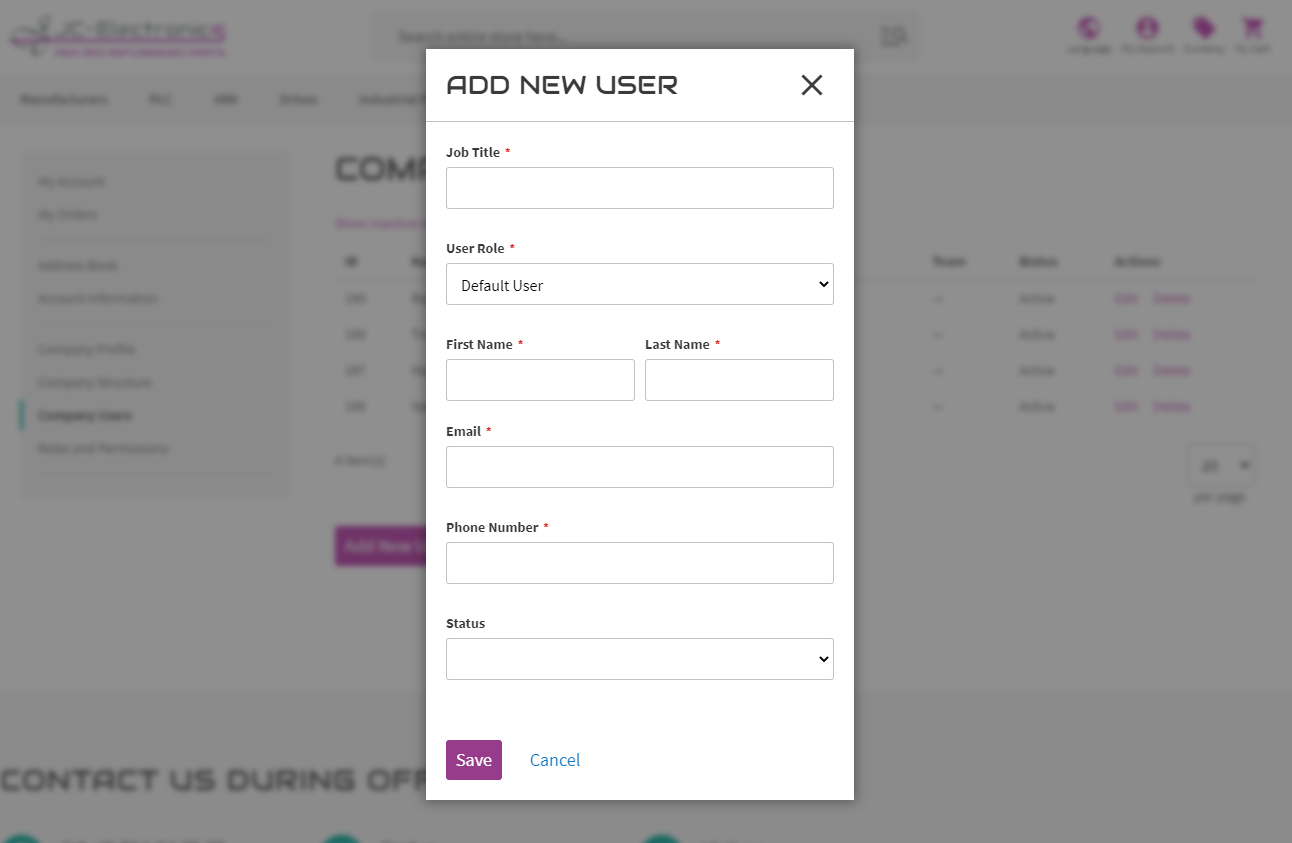
- Click Add New User and do the following:
- Enter the Job Title of the new user.
- If the roles and permissions are defined, choose the appropriate User Role. Otherwise, they can return later to assign the role.
- Complete the remaining fields as needed for the user:
- First Name and Last Name
- Phone Number
- When complete, clicks Save.
- Repeat the process to create as many company users as needed. The new users appear in the Company Users list, along with the Company Administrator.
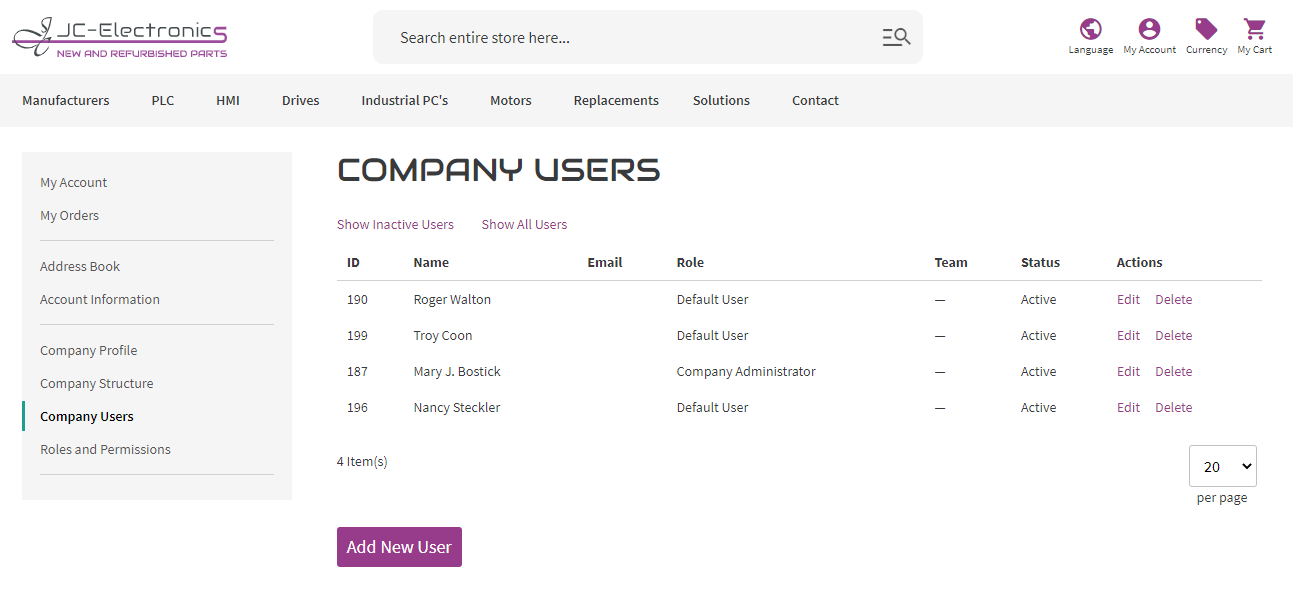
How do I change or delete the data of users (company users) in our company account?
As an administrator (company administrator) of the company account, you can add additional users (company users).
Edit company users
- From the storefront, the company administrator signs in to the account
- In the left panel, choose Company Users.
- Find the user record to be updated, and click Edit.
- Make the needed changes.
- When complete, click Save.
Remove a company user
- From the storefront, the company administrator signs in to the account.
- In the left panel, choose Company Structure.
- Select the company user in the company structure.
- Click Delete Selected.
- When prompted to confirm, click Delete.
What is the difference between company administrator and company users?
The company administrator is the administrator of the company account. There can only be one company administrator per company account. The company administrator can create one or more company users and assign them certain rights and permissions. For example, a company user can also use the webshop and order products.
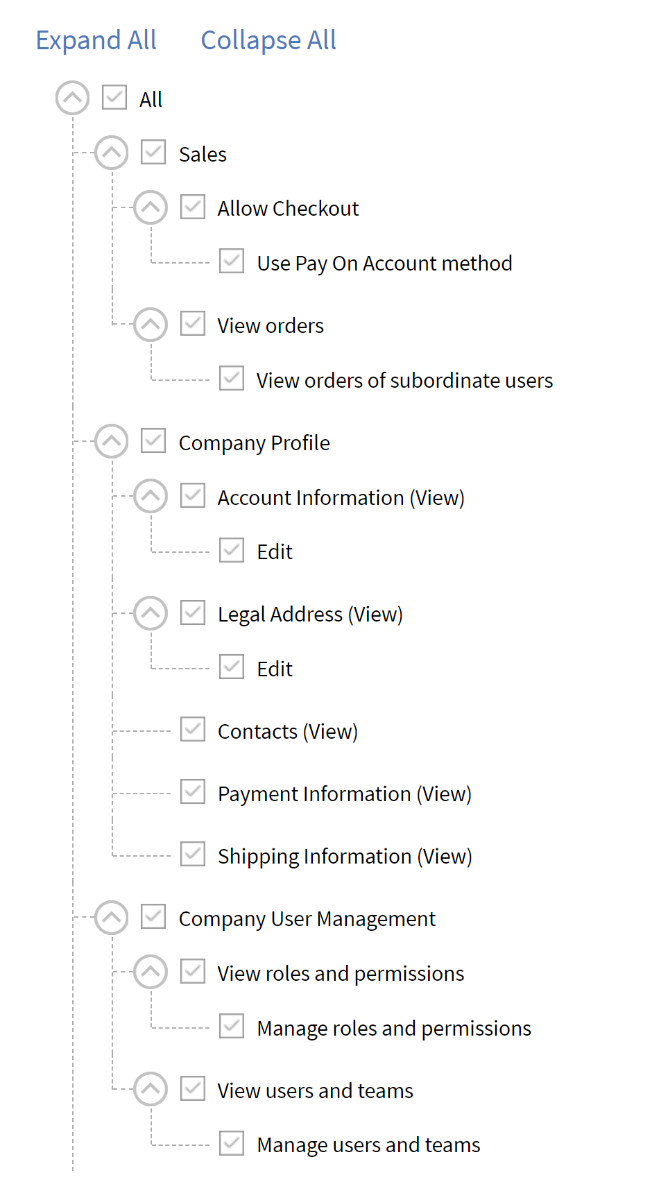
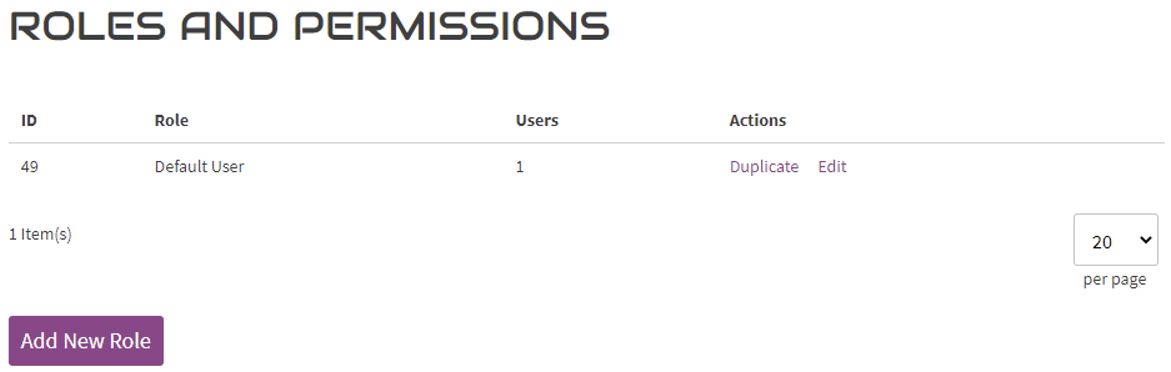
How do I change roles and rights and how do I assign them to company users?
Roles for company users set up with various levels of permission to access sales information and resources. By default, the company administrator is a super user with full permissions. The Access Denied page appears if the user does not have permission to access the page.
- Sign in to your store account as the company administrator.
- In the left panel, choose Roles and Permissions.
- Complete any of the following tasks.
Create a role
- Click Add New Role.
- Enter a descriptive Role Name.
- Under Role Permissions, do one of the following:
- Select the checkbox of each resource or activity that users assigned the role have permission to access.
- Select the All checkbox. Then, clear the checkbox of each resource or activity that users assigned to the role do not have permission to access.
- Click Save Role.
- Repeat these steps to create as many roles as necessary.
Modify a role
- For the role to be modified, click Edit in the Actions column.
- Make the necessary changes to the name and permission settings.
- When complete, click Save Role.
Duplicate a role
- For the role to be duplicated, click Duplicate in the Actions column.
- Make the necessary changes to the name and permission settings.
- When complete, click Save Role.
Delete a role
- Find the role to be deleted In the list of roles. Only roles without assigned users can be deleted.
- Click Delete in the Actions column.
- When prompted to confirm, click OK.
What roles and permissions are there?